Thursday, April 29, 2010

Split pea soup

Well, sports food fans, this is turning out to be quite the green week without any sort of planning at all.  I mean, I've noticed that during shopping trips, I sometimes tend to gravitate toward certain colors (perhaps because I'm wearing that very color) or I'm just in a mood for purple that day.  Maybe it's the onset of spring and the idea that produce is going to become much more inexpensive for the next few months (hooray!).  Maybe it's that I love to eat with my eyes first, and pretty colors excite me.  Or maybe, it's just because I had a hankerin' for vegetables after some sugar overload weekends.  Whatever the case may be, I haven't been disappointed or gotten bored.  I've just been saving some recipes to post at a later date and this, being a week late, seems to fit in perfectly after all.  Ramble ramble ramble.  Bring on the green, I say!  Bring on the food, you say!

[soup on my favorite little green tray]

There are so many perks to this recipe and since it's a little late and I'm not quite in the mood for well-transitioned paragraphs, I declare that it's time for a list.  And I loooooooove lists.

1. The colors in this soup absolutely make me want to shout from the rooftops, "Ye who are hungry, come feast with me on this most beautiful and delicious soup!"  Orange!  Green!  Pink!  White!
2. For a mostly (or all, if you'd prefer) vegetable soup, it is unbelievably hearty and satisfying and chock-full of flavor.  Proof: a certain meat and potatoes guy was "stuffed" after a bowl of this splendor.
3. It's so easy to prepare, partly because split peas are one of the most fool-proof ingredients ever.  No no, don't think that these require the same attention that dried beans do with the rinsing, soaking, cooking, soaking, and on and on.  Just pour the peas into the hot liquid and they cook on their own in about 40 minutes.
4. It is jaw-droppingly inexpensive.  A one pound bag of split peas will run you about $1.  Carrots... maybe $2.  Three little potatoes... oh gosh, I don't know.  $1.29/lb ish?  Garlic and the rest of the seasonings are basic pantry items, so I'll skip those.  One onion... again, cheap.  And though I used chicken stock for about $2/32-ounce container, I've used water previously and gotten the same great taste.  A slice of ham is optional.  And for how much this makes, it is so worth it!
5. Have I mentioned the flavor?  Oh my goodness.  Just trust me.  DEE-LIH-SHUSS! 


Parker's Split Pea Soup
(from The Barefoot Contessa Cookbook)
-yields roughly 10-11 cups

1 cup chopped yellow onion (one medium onion)
2 cloves garlic, minced
2 Tablespoons olive oil
1/2 teaspoon dried oregano
1 1/2 teaspoons salt
1 teaspoon ground black pepper
2 cups medium-diced carrots (3-4 large carrots or 1 bag of baby cut carrots)
1 cup medium-diced red boiling potatoes, unpeeled (3 small)
1 pound dried split green peas
8 cups low sodium chicken stock (so you can control the salt in the soup)
2 cups chopped ham steak, optional


In a large stock pot over medium heat, saute the onions and garlic with the olive oil, oregano, salt, and pepper until the onions are translucent, 10 to 15 minutes.  Add the carrots, potatoes, 1/2 pound of the split peas, and all of the chicken stock.  Bring to a boil, then simmer uncovered for 40 minutes.  Skim off the foam while cooking.  Add the remaining split peas, and  ham (if using) and continue to simmer for another 40 minutes, or until all the peas are soft.  Stir frequently to keep the solids from burning on the bottom of the pot.  Remove from heat, and taste for salt and pepper, season as needed.  Serve hot with some super crusty bread.

Store in sealed container in refrigerator for up to a week, or portion out cooled 1 cup servings in sandwich bags and freeze for later reheating.  I find that after the first night of storing in the fridge, the contents tend to absorb even more of the liquid, making for a rather stiff soup.  I add 1-2 more cups of water and stir gently with a spoon until the right soup consistency is reached.

Tuesday, April 27, 2010

Lemon zucchini saute with thyme and parmesan


As much fun as it is to cook a fancy and elaborate entree, sometimes I feel bad for the side dishes -- they are such an afterthought most of the time.  A side salad.  Steamed rice or a plain vegetable.  Heck, I've eaten sides that don't even get the benefit of a little basic salt and pepper.  What gives, people?!  Why can't the shining star of a meal be a side dish or two?  After all, most vegetables are much prettier than the colors of typical main dishes (think beef, chicken, fish... brown, ivory and white).  So, I dedicate this post to you, the side dish, the middle child of the food world.  No longer will you be eaten just for filler or ignored because there is a luxurious dessert waiting in the wings.

I present to you one of the easiest and freshest side dishes on the planet -- lemony zucchini with parmesan.  Again, another dish born of the "Oh, there is pretty zucchini at the grocery store!" and then later realizing, "What am I going to do with said zucchini before it goes to waste in my refrigerator?"  And, the always classic, "What do I have in my pantry to work with?"  I've noticed a pattern in my impulsive grocery shopping: zucchini is usually the first thing in my cart that wasn't on my original list.  Better than Oreos, I suppose.  With all of this zucchini, I've got a bit crazy.  Zucchini pizzaZucchini chips.  Time for a new zucchini dish -- a side!  The lemon and thyme really wakes up (read: tastes like something from a nice restaurant, as they all use lemon juice as a secret ingredient) the zucchini and the nutty parmesan really makes everything better.


Lemony Zucchini with Thyme and Parmesan
-makes 4 servings

3 medium (1 1/2 pounds) zucchini
4 teaspoons extra virgin olive oil
Salt
Ground black pepper
1 Tablespoon lemon juice
1 teaspoon fresh thyme leaves
Parmesan cheese

Cut zucchini into large pieces (3/4-inch thick slices, which are then cut into fourths).  In a large skillet, heat oil over medium high.  Add the zucchini and toss to coat with oil.  Season with salt and pepper and cook until golden brown in spots, roughly 4 minutes.  Transfer zucchini to serving bowl.  Add lemon juice and fresh thyme, toss to coat.  Taste for seasonings and add salt and pepper as desired.  Grate cheese (as much as you want) over zucchini and serve hot.

Monday, April 26, 2010

White birthday cake with strawberry meringue buttercream

[happy birthday, miss natalie!]

While I will certainly cause at least a bit of emotional scarring in my future kids with various themed nights and excessive picture taking, there is one thing I will promise to always do for as long as I'm able -- make their birthday cakes from scratch.  Don't get me wrong, not everyone has the time or even desire to do this, but to me, baking is something I truly enjoy and what better way to celebrate loved ones birthdays than to present them with a cake of their choice!

Anyway, I digress.  When a friend or relative's birthday approaches, I send out feelers in the form of a voicemail or email with a listing of options for cake and icing flavors.  This particular pal said she had been craving white cake and strawberry frosting.  I happily accepted the order since it was something other than the classic yellow cake and vanilla buttercream (though they are delicious, I love me some variety).  Oh and you know, I love her dearly and wanted to present her with a cheerful and scrumptious birthday confection :)

This cake stays white by using bleached cake flour and omitting egg yolks.  The cake flour gives the finished product a super light and fluffy texture but still has the great vanilla flavor that most white cakes seem to lack, so it stands up to many varieties of toppings -- in this case, strawberry meringue buttercream.

Note: I halved this recipe and made only one 9-inch cake and cut it in half to make a two layer cake that would be more appropriate for a gathering of 10 people.  If you're having 15 or more, a full two layer 9-inch cake would be perfectly fine.


White Cake
-makes two 9-inch layer cakes or 24 cupcakes

3 cups cake flour (not self-rising)
2 teaspoons baking powder
1 teaspoon salt
3 sticks (1 1/2 cups) unsalted butter, room temperature
2 1/4 cups granulated sugar
1/2 teaspoon pure vanilla extract
1 cup milk
8 large egg whites
Strawberry Meringue Icing (recipe to follow)

Preheat oven to 350F.  For cakes, butter two 9-inch round cake pans, line bottoms with parchment paper.  Butter parchment, dust with flour and tap out excess and set aside.  (For cupcakes, line 2 12-cup muffin pans with paper liners and set aside.)  In a medium bowl, sift together the flour, baking powder, and salt, and set aside.

In the bowl of an electric mixer fitted with the paddle attachment, beat the butter and 2 cups granulated sugar on medium speed until light and fluffy, 3 to 4 minutes, scraping down sides of the bowl as needed.  Beat in the vanilla.  With mixer on low speed, add 1/3 of the flour mixture, 1/2 of the milk, second third of the flour mixture, remaining milk, and last third of the flour mixture, beating until combined after each addition.  Scrape down sides of the bowl as needed.  Transfer mixture to a large bowl and set aside.

Clean bowl of the electric mixer now and dry immediately.

In the clean bowl of the electric mixer fitted with the whisk attachment, beat the egg whites on low speed until foamy.  With mixer running, gradually added the remaining 1/4 cup of granulated sugar.  Beat on high speed until stiff, glossy peaks form, about 4 minutes.  Do not overbeat!  VERY gently, fold a third of the egg white mixture into the butter flour mixture until just combined.  Gently fold in the remaining egg whites.

Divide batter evenly among cake pans (or muffin cups) and smooth tops with an offset spatula.  Bake, rotating pans halfway through, until the cakes are golden brown and a cake tested inserted in the center of the cake comes out clean, 30 to 35 minutes.  Transfer pans to a wire rack to cool for 20 minutes.  Invert cakes onto the rack, peel off the parchment paper, and reinvert cakes to allow to cool completely, tops sides up.

Trim tops of cake layers with a serrated knife to level.  Spread 1 cup buttercream on first layer, place second layer on top, cut side down.  Spread the entire cake with the remaining frosting and garnish finished cake with whole strawberries.


Strawberry Meringue Buttercream
-makes 5 cups

4 large egg whites
1 1/4 cups granulated sugar
3 sticks (1 1/2 cups) unsalted butter, room temperature, cut into tablespoons
1 teaspoon pure vanilla extract
1 1/2 cups (12 ounces) strawberry jam (seedless is important!), pureed in a mini food processor

In a glass bowl over a saucepan of simmering water, combine egg whites and sugar.   Cook, whisking constantly, until the sugar has dissolved and the mixture is warm to the touch (about 160F).

Pour the contents of the bowl into the bowl of an electric mixer (or keep in same bowl if not using a stand mixer) and attach the bowl to the mixer fitted with the whisk attachment.  Beat the egg-white mixture on high speed until it holds stiff (but not dry) peaks.  Continue beating until the mixture is fluffy and cooled, about 6 minutes.

Switch to the paddle attachment.  With the mixer on medium-low speed, add the butter several tablespoons at a time, beating well after each addition.  (If the frosting seems to separate after all the butter has been added, beat on medium-high until smooth again, 3 to 5 minutes more.)  Beat in vanilla.  Beat on lowest speed to eliminated any air bubbles, about 2 minutes.  Stir in strawberry jam with a rubber spatula until frosting is smooth.  If a more pronounced pink color is desired, add two drops of red food coloring at a time, stirring thoroughly until exact shade is achieved.

Frost cake or cupcakes and enjoy!!  Candles are, as always, recommended, whether there is a birthday or not.  You can find something to celebrate, surely.  Monday, perhaps?

Thursday, April 22, 2010

Scones with white chocolate & dried cherries

(Thanks for being patient with me this morning, you know, if you are an early reader.  The office move went well and these scones were devoured rather quickly -- even in the midst of a box of Dunkin' Donuts, quite the opposition.  I am very proud of this victory, regardless of the fact that I, too, enjoyed a doughnut.  What can I say?  I'm an equal opportunity pastry lover.)

[changing the world, one scone at a time]

Oh, scones.  Unfortunately you've earned a bit a bit of a bad reputation in the world of pastries and are usually passed up for your neighbors, muffins and danishes.  It's true that, at times, you may be a little too dense and floury, bland, and even too crumbly for on-the-go eating.  It's not you, scone, it's the baker.  You just haven't been given the attention and makeover you deserve.  This is your moment -- embrace it!  For now, the world will know of your greatness, one miniature at a time.

These scones are light and delicious.  So refreshingly delicious.  The sweetness of the white chocolate is perfectly complimented by the sour of the cherries.  And the pastry is so fluffy, not dry or heavy.  I could eat ten of them, but I managed to restrain myself a little... probably because I was half asleep still.  Everyone who had them took a bite, said how good they were.  Another bite immediately followed and then they all looked at me and said, rather incredulously, "These are so light!"  As if I were trying to trick them into eating some cement-like scone.  [shakes head]  You should know better by now, colleagues.  Oh, and these scones are a cinch to throw together.  For proof, here is a picture and my morning timeline:


6:00 - Wake up to the classical radio station, wishing I'd had more sleep
6:05 - Preheat oven, shower, continue to wake up
6:20 - Make bed, dress... YES, jeans today!  Oooh, jeans because it's moving day.  Right.
6:31 - Prep ingredients and tools, begin baking
6:45 - Scones into oven.
7:00 - Remove scones from oven (no joke -- almost forgot the oven mitt)
7:05 - Eat a piece of spinach quiche, banana and warm scone for breakfast
7:20 - Hear on ESPN that Washington and Boston both won, and Ben Roethlisberger is a giant ...
7:45 - Wrap up scones, brush my teeth and head out the door to work

I really planned on taking a picture of the fluffy colorful (and flavorful) interior of these scones.  I broke one in half and, well, after that, it's all a blur.  I must've eaten devoured it.  This is all that was left.  And I didn't want to "sacrifice" another one since I was taking these to work.  So, well, it's the thought that counts, right?


Cream Scones with Cherries and White Chocolate
(adapted from a recipe in America's Test Kitchen Cookbook)
-makes 15 mini (2 1/2-inch) scones or 8 regular size scones

Note: Feel free to replace the dried cherries and white chocolate chips with something more up your alley.  Fresh blueberries, diced up apple, another dried fruit, cinnamon chips... you name it.  Or maybe something savory -- cheddar, dill, etc.

2 cups all-purpose flour
1 tablespoon baking powder
3 tablespoons granulated sugar
1/2 teaspoon salt
5 tablespoons chilled, unsalted butter, cut into 1/4-inch cubes
1/2 cup dried cherries, cut into smaller pieces
1/2 cup white chocolate chips or chunks
1 cup heavy cream

With rack in the middle of the oven, preheat to 425F.  In a large bowl, whisk together flour, baking powder, sugar, and salt.  With a pastry blender (or fork, if you don't have one), quickly cut butter into flour mixture until it resembles big crumbs with a few larger butter clumps (the size of peas).  Stir in chopped cherries and white chocolate.

Stir in heavy cream with a rubber spatula until dough begins to come together, about 30 seconds.  Transfer dough (even the dry pieces) to a lightly floured surface.  Knead dough by hand just until it comes together to form a sticky ball, five to ten seconds.  [Note: If you don't have or want to use a biscuit cutter, pat dough into square or circle and cut scones into even squares or triangle shapes.]  Form scones by patting the dough into a 3/4-inch thick circle, cutting scones with a floured 2 1/2-inch biscuit cutter and pressing remaining scraps back into another piece.  Repeat until dough has been used up.

Place scone shapes on an ungreased baking sheet and sprinkle with little granulated sugar, if desired.  Bake until the tops of the scones are light brown, 12 to 15 minutes.  Cool on a wire rack for at least 10 minutes. Serve warm or at room temperature.  These are best the day they're baked, but can be kept in an airtight container, if necessary, for a day.  As always, butter is a welcome addition, but even I skipped the butter.  Yep, they were that good.

Tuesday, April 20, 2010

Beef & red bean chili

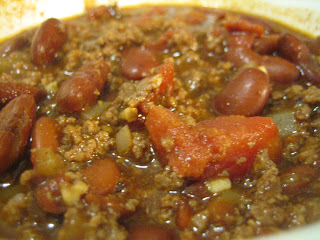
[there is no such thing as a photogenic chili, so we'll say that I'm in love with its personality]

My love for chili seems to go against my very nature.  You see, my brain is hard-wired for science, math, things of an exact nature, which is probably why I've always preferred (read: been better at) baking to cooking.  Baking is to science as cooking is to art, and I am in no way artistic.  Baking requires exact proportions of leavening to flour to fat, etc etc.  Cooking once scared me because phrases like "eyeball it" and "a dash of this" and the ever-popular "season to taste" are everywhere, seemingly reminding me that I have no actual culinary training and if I'm making said recipe for the first time, how should I know what it's supposed to taste like?  Huh, Mr. Snooty Chef, huh?

Well, chili is probably one of the most flexible recipes out there, so I've learned that my phobia was very unwarranted at best and basically downright unreasonable.  I'd put it right up there in difficulty with quiche, and we all know that my love for this easy crusty eggy make-it-your-own dish knows no bounds.  I've read that you really can't mess up chili -- and I'm here to say that statement is true!  (Note: I mean, don't expect any sympathy from me if you play devil's advocate and make this with ridiculous ingredients like Swedish fish and Cherry 7-Up.  Wow, I like that those are the first two random foods that come to mind.)  If it's too dry, add more liquid.  If it's too bland, add more seasoning.  And since it's all a stove-top process and everything is already cooked and merely warming and melding, adjustments seemed easy.  After all, there are a few staples of standard chili: ground meat (even that can be omitted for vegetarians), beans, liquid of some sort, vegetables, and seasonings.  In fact, I swear that until this go-round, I'd never even used a recipe nor measured ingredients [gasp], thus making each batch of chili I've made different from its predecessor.

I have previously favored ground turkey in my chili, but a wise man in my life alerted me to my recent beef cravings and suggested I go along with it. (Good call, wise man.)  I like my chili on the sweet side, but feel free to cut back on the amount of brown sugar or add hot sauce if you like it with a spicy kick.  As for the liquid, I had tomato juice on hand and I like the flavor, but I've seen beef broth, a can of beer, or even water used as the liquid in chili.  For the beans and veggies, substitute your favorite bean for one or both cans of kidney beans if you're in a daring mood.  In a previous batch, I added a cup of sweet corn off the cob and it was delightful.  Experiment!  And when it comes to seasonings, I promise I tried to be good for your sake and measure everything out, but let me tell you a little secret -- it doesn't matter!  When you get to the end, let a little spoonful of the chili cool slightly and test it.  Add more of whatever you want to reach desired taste.  That's very anti-recipe of me, but hey, it's YOUR chili!  Make sure you like it!

Oh and finally, one little secret yet oddball ingredient whose presence may have raised an eyebrow or ten -- unsweetened cocoa powder.  I've seen it in a few recipes over the years and thought I'd give it a whirl.  You will not taste chocolate in your chili, unless you dump a cup of it in the pot.  But it gives another level of flavor to the chili and holy cow [no pun intended, but well-played, Katy], you'll never make chili without it again.


Beef Red Bean Chili
-makes 9 cups

2 pounds ground beef (I used 95% lean, but use whatever you like)
1 cup diced yellow onion
2 cloves garlic, minced
1 cup tomato juice or beef broth... or beer... or water
1 Tablespoon unsweetened cocoa powder
1 Tablespoon chili powder
1 14-ounce can diced tomatoes
2 15-ounce cans of light red kidney beans, drained
1 Tablespoon balsamic vinegar (optional)
1/3 cup brown sugar
1 teaspoon salt
1/2 teaspoon black pepper

In a large pot or Dutch oven over medium-high heat, add meat and cook until evenly browned, about 5 minutes.  Add onion and cook until onion is translucent, about 3 minutes.  Add garlic and cook an additional minute, stirring occasionally.  Add tomato juice, cocoa powder, chili powder, reduce heat to medium and cover for 10 minutes.  Add the beans, brown sugar, salt, and pepper, stirring until well distributed.  Taste and season until you're happy!

Serve hot and garnish with sour cream, some grated cheddar cheese, or even minced jalapeno... you know, if you're of the crazy persuasion. Enjoy with fresh corn bread.  (And yes, that's a mix but it's the easiest/quickest muffin ever and after "slaving" over a hot stove, why not use a shortcut or two so you can enjoy your hard work sooner?)

Store in sealed container in refrigerator for up to a week or freeze in 1 cup portions in Ziploc bags; thaw in refrigerator for a day and reheat.